

In previous post, knowledge hub provides reasons why you should learn OpenCV. In this post, knowledge hub will guide how to build OpenCV from source code by using OpenCV using CMake and Qt MinGW.
Before starting to build OpenCV, it supposes that you have already installed OpenCV, CMake, and Qt MinGW on your computer.
We have opted Qt because it becomes one of the most popular frameworks to develop more advance GUI application.
Before starting to build OpenCV, it supposes that you have already installed OpenCV, CMake, and Qt MinGW on your computer.
We have opted Qt because it becomes one of the most popular frameworks to develop more advance GUI application.
- Step 1: Please set Path in Environment variable
C:\Qt\Qt5.4.0\5.4\mingw491_32\bin;
C:\Qt\Qt5.4.0\Tools\mingw491_32\bin;
C:\Program Files (x86)\CMake\bin;
C:\Qt\Qt5.4.0\Tools\mingw491_32\bin;
C:\Program Files (x86)\CMake\bin;
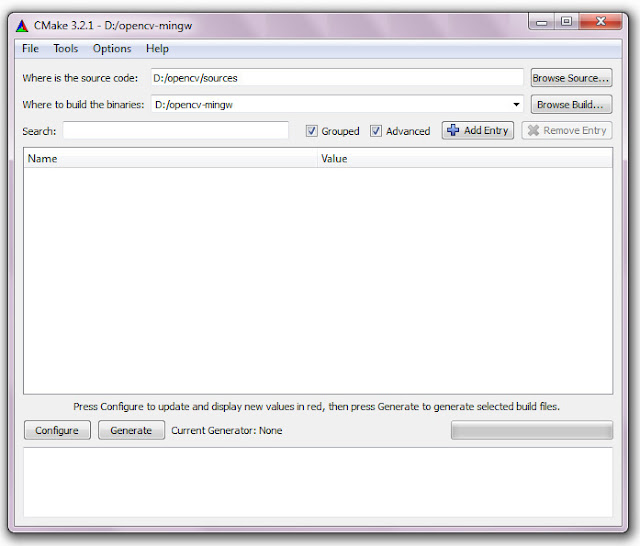
- Step 2: Open cmake, set source path to D:\opencv\sources and binary path to D:\opencv-mingw.Please create folder named opencv-mingw in the extracted OpenCV folder. Then, please select 'Grouped' and 'Advanced'.
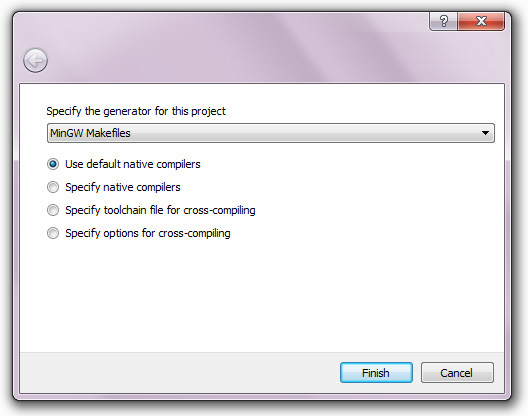
- Step 3: Click the button configure. It will pop up a window to let you to specify the generator for the project. From the dropdown list please choose 'MinGW Makefiles' and 'Use Default native compilers'. Then, hit the finish button.
- Step 4: In case, CMake cannot find java directory please fill in the java path in the java section in CMake. Suppose you installed java sdk in the following folder:
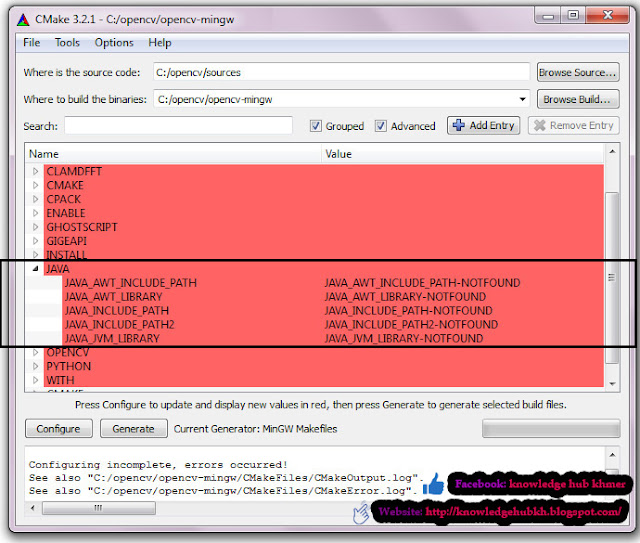
JAVA_AWT_LIBRARY = C:/Program Files/Java/jdk1.7.0_45/lib
JAVA_JVM_LIBRARY = C:/Program Files/Java/jdk1.7.0_45/lib
JAVA_INCLUDE_PATH = C:/Program Files/Java/jdk1.7.0_45/include
JAVA_INCLUDE_PATH2 = C:/Program Files/Java/jdk1.7.0_45/include/win32
JAVA_AWT_INCLUDE_PATH = C:/Program Files/Java/jdk1.7.0_45/include
JAVA_JVM_LIBRARY = C:/Program Files/Java/jdk1.7.0_45/lib
JAVA_INCLUDE_PATH = C:/Program Files/Java/jdk1.7.0_45/include
JAVA_INCLUDE_PATH2 = C:/Program Files/Java/jdk1.7.0_45/include/win32
JAVA_AWT_INCLUDE_PATH = C:/Program Files/Java/jdk1.7.0_45/include
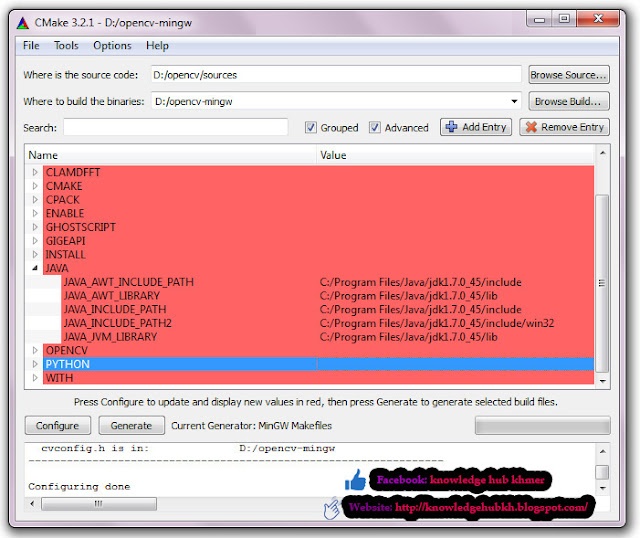
- Step 5: Please go to WITH section in CMake and tick With Qt and With OpenGL respectively.
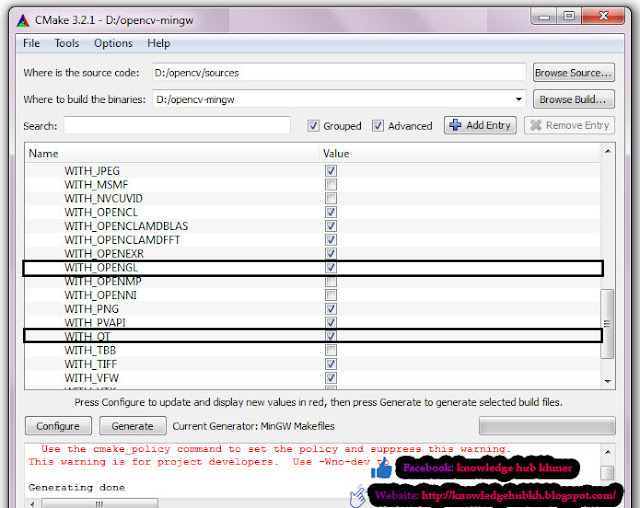
- Step 6: Then, hit the configure button again. When configure is done, please click the generate button and wait until it finishes.
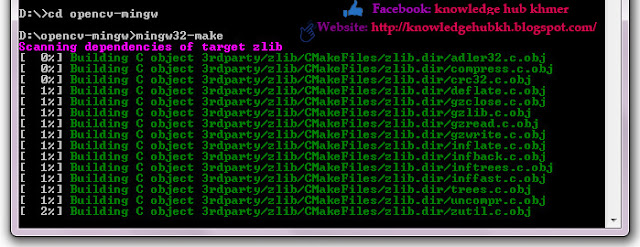
- Step 7: Now open command prompt go to D:\opencv-mingw. Type: mingw32–make and wait until it finishes.
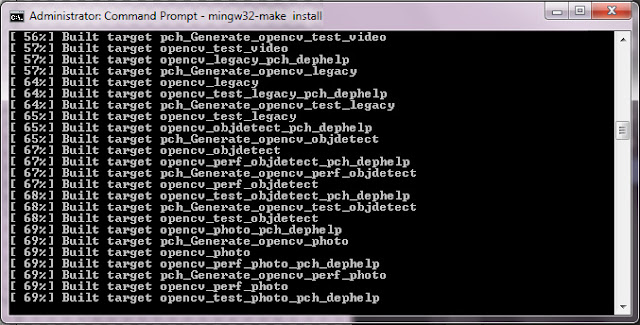
- Step 8: Then type: mingw32–make install


See also:
No comments:
Post a Comment